CyRisk Protect
Third-Party Risk Management (TPRM) User Guide
TPRM Summary
IN THIS GUIDE
Introduction
The Third-Party Risk Management feature in CyRisk Protect brings together vendor management, risk assessment, and threat monitoring for a complete view of third-party risks. The platform streamlines onboarding, enables in-depth assessments using both pre-built and custom questionnaires, and integrates external threat intelligence to enhance insights. By identifying, prioritizing, and reporting risks efficiently, it also simplifies the remediation process, ensuring that risk management is both proactive and thorough.
Getting Started
browser version and network settings.
Access and Navigation: Log in
through the CyRisk
Protect main page. Navigate to
the sidebar and select 'Third Party Risk Management' then 'Vendor
Risk
Management'.
User Interface Overview: Familiarize yourself with the
layout, including the location
of key features such as the 'Add Vendor' button, vendor list, and
compliance sections.
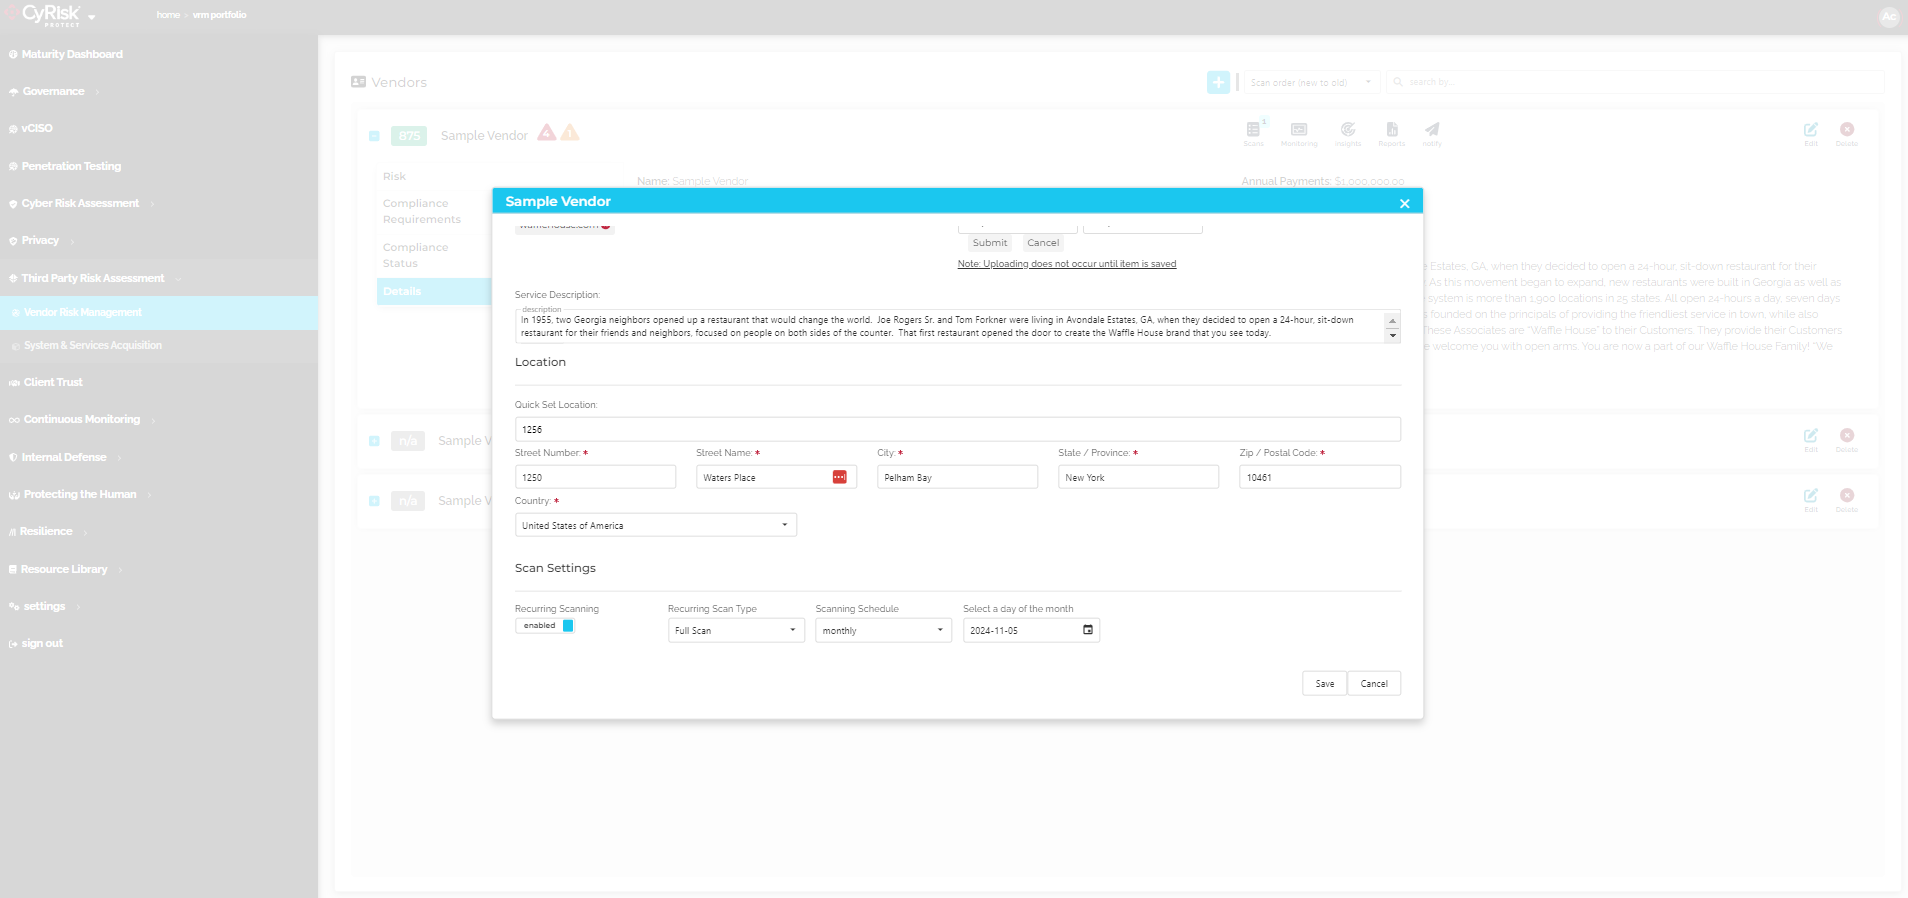
Adding a New Vendor
Risk Management dashboard.

Form Details:
Company Information: Enter the vendor's name, primary contact, and email.
and assess their criticality to your operations.
Financial Information: Input the annual payment to the vendor if applicable.
Contracts and Service Descriptions: Upload contracts or provide URLs and describe
the service they provide.
Scan Options: Decide whether to scan the vendor immediately and set up recurring
scans.
Saving the Vendor: Review all information, save the profile, and decide if you wish to
invite the vendor immediately.

Inviting a Vendor and Vendor Login
email.

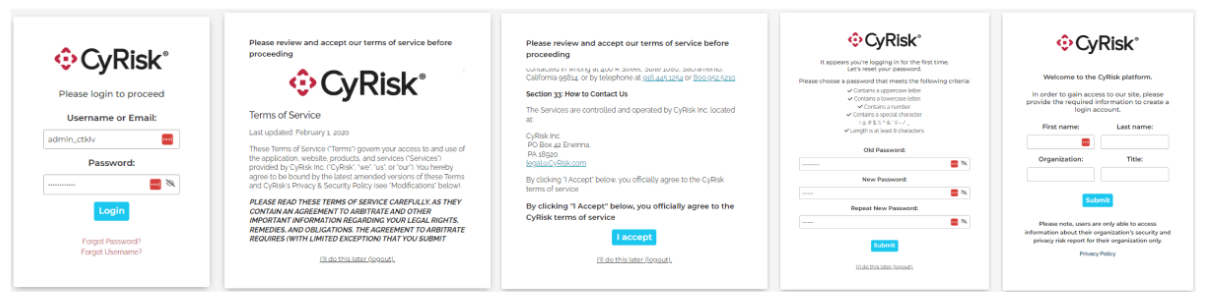
Vendor Onboarding Process:
Receiving Credentials:
Vendors get an email with a temporary password and
username.

Account Setup: Vendors must log in, update their password, and accept the terms of service.
Completing Registration: Vendors must enter personal and organizational details to fully set up their profile.
Managing Vendor Compliance
Compliance Requirements Setup: Under a vendor's expanded menu, select 'Compliance Requirements'.

Adding Requirements: Click 'Add Requirement', choose a compliance framework (e.g., HIPAA, NIST), and send it to the vendor.
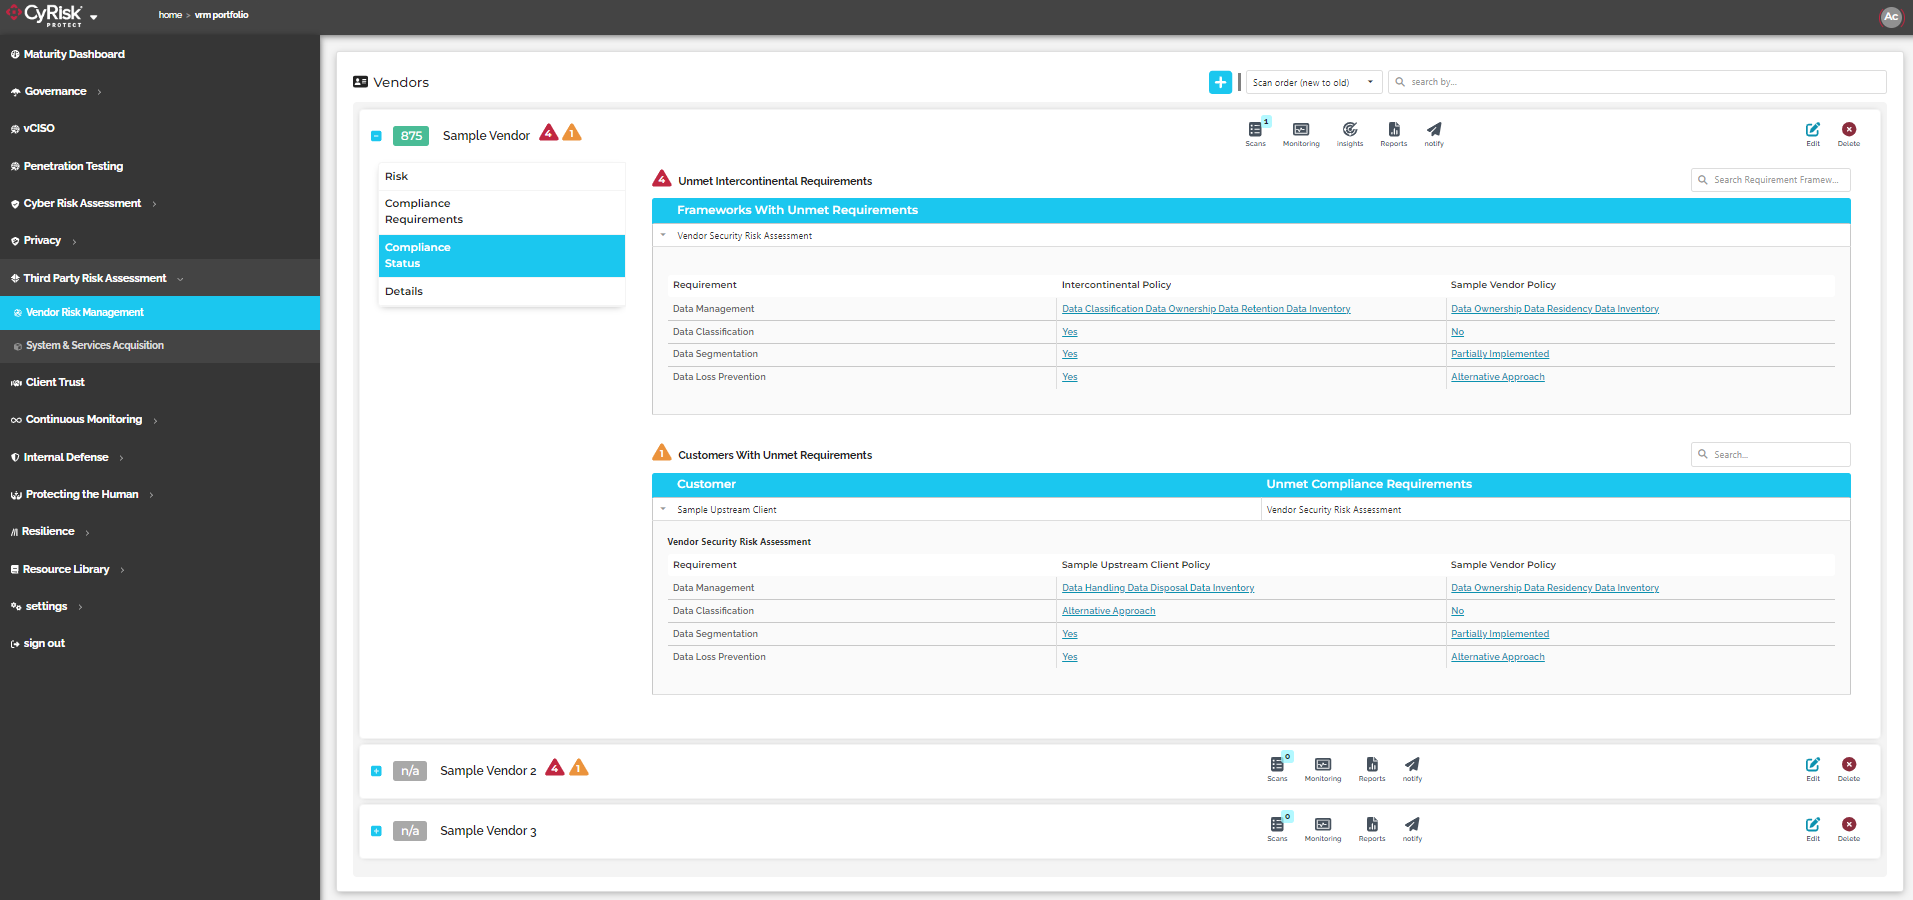
Tracking Compliance: Monitor which compliance frameworks have been met and which are pending.

Scanning Vendors
Initiating Scans: From the vendor profile, click 'Scans', then 'Request Scan' to start an immediate security assessment.
Scheduled Scans: Set scans to occur on a regular basis based on the initial setup.


Reviewing Compliance Status
Viewing Details: Click on the 'Compliance Status' in the vendor's profile to see detailed compliance information, including any discrepancies and areas of non-compliance.
Notifications and Communication
Alerts: Use the 'notify' button to remind vendors of incomplete compliance tasks or upcoming deadlines.

Adding an Upstream Partner
Access and Navigation: Log in through the CyRisk Protect main page. Navigate to the sidebar and select 'Client Trust.’
Opening the Add Vendor Form: Click on the blue plus sign at the top of the Customer Compliance dashboard.
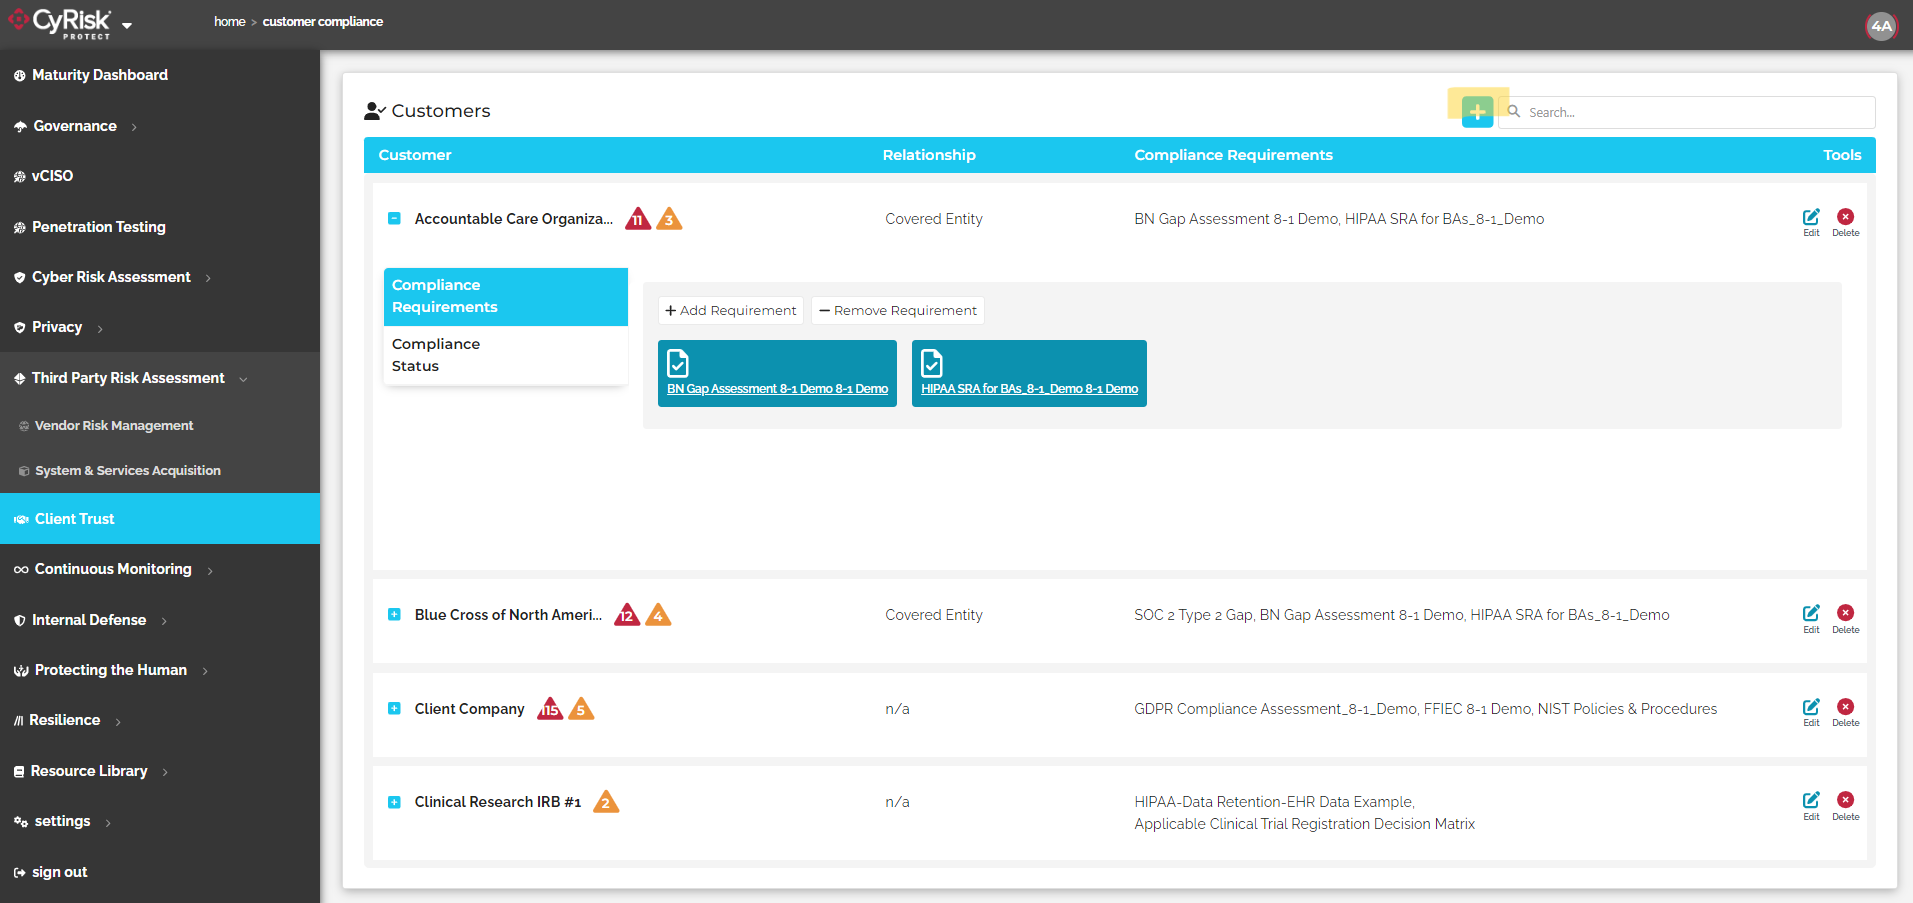
Form Details:
Company Relationship: Select the type of relationship (Business Associate, Covered Entity, other, n/a).
Company Information: Enter the Customer's name, primary contact, primary contact email, number of employees, description, and address.
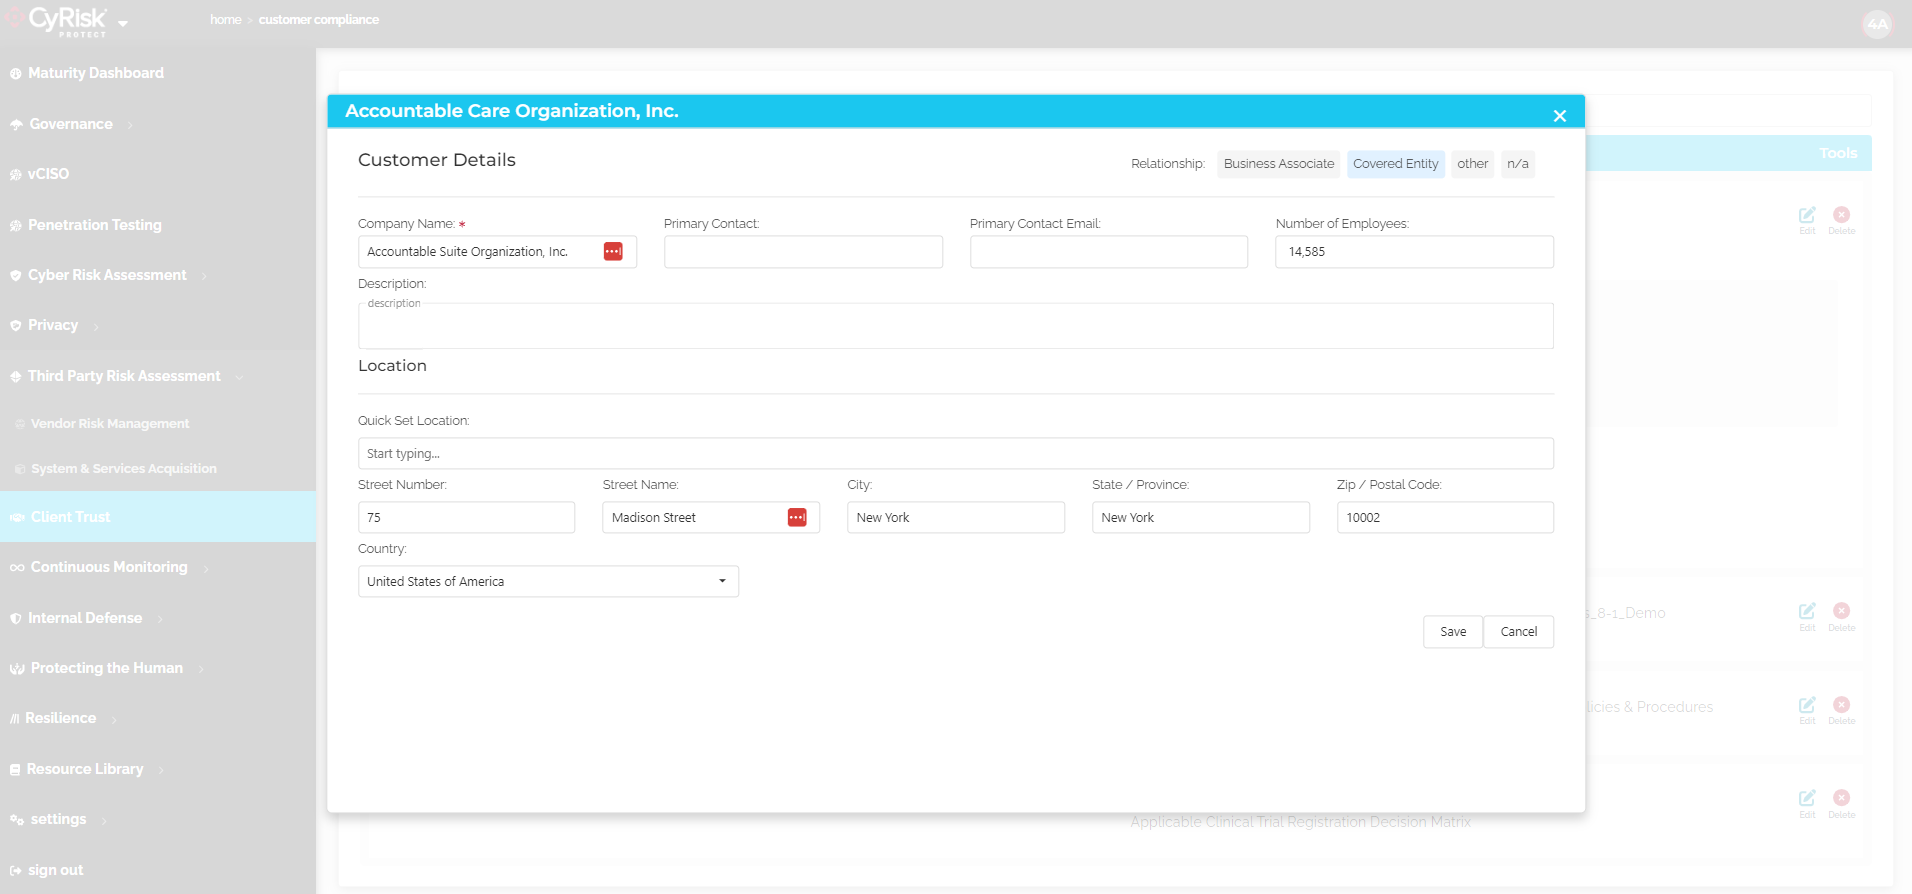
Compliance Requirements Setup: Under a customer's expanded menu, select 'Compliance Requirements'.
Adding Requirements: Click 'Add Requirement', choose a compliance framework (e.g., HIPAA, NIST), and add it to the upstream customer.
Ensuring Compliance: Click into the recently added compliance framework, fill out the upstream partner’s compliance requirements on their behalf
Tracking Compliance: Monitor which compliance frameworks have been met between your upstream customer, your organization, and your downstream vendors.

User Journeys
A. Parent TPRM Account User Journey
Objective: Manage and assess the risks associated with third-party vendors effectively.
- Login and Dashboard: The journey begins by logging onto the CyRisk platform and navigating to the Vendor Risk Management dashboard via the sidebar.
-
Adding Downstream Vendors:
Navigate to 'Add Vendor' by clicking the blue plus icon within Vendor Risk Management.
Enter all relevant vendor details including data activities, financials, and compliance needs, and save the vendor profile.
The option is to scan the vendor immediately or set up recurring scans. -
Vendor Invitation:
Send an invitation to the vendor with temporary credentials immediately after profile creation.
-
Compliance Management:
Regularly update and manage compliance requirements for each vendor by assigning specific frameworks and tracking completion.
Receive alerts and notifications regarding compliance status and updates.
-
Scanning and Monitoring:
Conduct initial and periodic scans to assess vendor risk.
Review scan results and take necessary actions based on the findings. -
Adding Upstream Customers:
Navigate to 'Add Customer' by clicking the blue plus icon within Client Trust
Enter all relevant Customer details.
Add a compliance framework into the customer’s framework repository.
Fill out your upstream customer’s compliance requirements.
-
Review and Reporting:
Regularly check the overall compliance and risk status from the maturity dashboard.
Generate and review reports for internal audits and compliance verification.
B. Vendor User Journey
Objective: Complete the necessary compliance and security processes to align with the requirements of the VRM account holder.
-
Receiving the Invitation:
Receive an email invitation with login credentials.
First-time login involves changing the temporary password and accepting the terms of service. -
Profile Setup:
Enter required personal and organizational details such as name, title, and organization. -
Compliance Tasks:
Access assigned compliance frameworks from the notification section.
Fill out and submit the compliance assessments as directed. -
Participating in Scans:
Respond to scan requests and review scan results.
Take necessary actions to address any identified vulnerabilities or risks. -
Ongoing Communication:
Receive notifications about required updates or additional information requests.
Use the contact details provided for any queries or support needs.